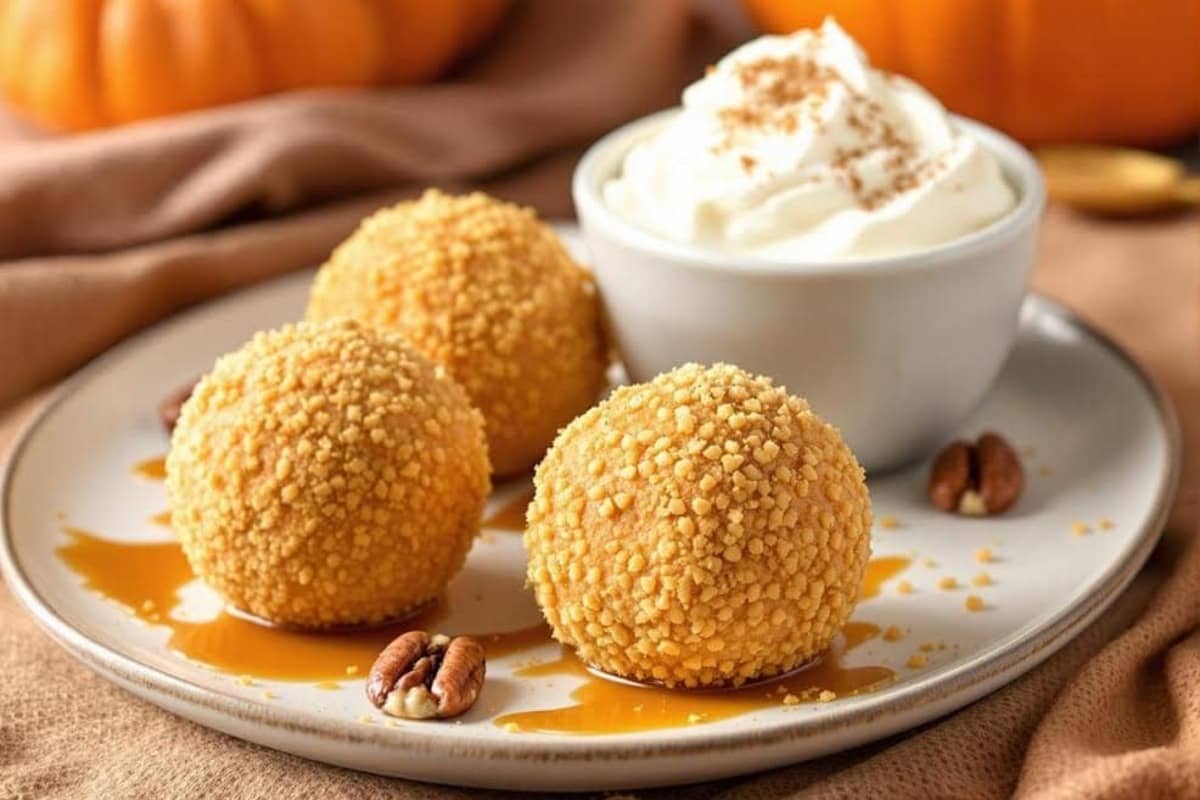
3-Ingredient Pumpkin Cheesecake Balls are a quick, no-bake treat that also makes a great breakfast option when you’re craving something sweet but simple. They’re soft, creamy, and packed with fall flavors like pumpkin and cream cheese, with a slight crunch from graham crackers. The best part? They require only three ingredients and can be made in minutes! Enjoy them as a grab-and-go morning bite, a coffee companion, or a healthy alternative to sugary pastries.
Table of contents
Why Are No-Bake Desserts So Great?
No-bake desserts are amazing because they’re quick, easy, and don’t require any baking skills. Here’s why you’ll love making them:
- Super Fast: You can make these treats in just a few minutes.
- No Oven Needed: Perfect for hot days or when you don’t want to bake.
- Easy for Everyone: Even kids can help roll the balls or mix the ingredients.
- Customizable: You can add fun coatings or toppings to make them even better.
These pumpkin cheesecake balls are great when you need a dessert in a hurry or just want to try something fun and simple!
What Ingredients Do You Need?
You only need three main ingredients for this recipe. Let’s look at each one:
1. Pumpkin Puree
Pumpkin puree is what gives these cheesecake balls their fall flavor. Make sure to use pure pumpkin puree, not pumpkin pie filling. Pumpkin pie filling has added sugar and spices, but pure pumpkin puree lets you control the flavor.
2. Cream Cheese
Cream cheese makes the cheesecake balls creamy and smooth. You can choose:
- Regular Cream Cheese: For a rich and creamy taste.
- Low-Fat Cream Cheese: A lighter option that still works well.
Tip: Let the cream cheese sit out at room temperature before you start. This makes it softer and easier to mix.
3. Graham Crackers
Crushed graham crackers help hold everything together and add a little crunch. You can also try:
- Gluten-Free Graham Crackers: If you want a gluten-free version.
- Cinnamon Graham Crackers: For an extra touch of spice.
How to Make 3-Ingredient No-Bake Pumpkin Cheesecake Balls
Now that you know what makes these treats so special, let’s jump into how to make them. With just three simple ingredients, this recipe is fun and easy to follow. Let’s get started!
Step 1: Mix the Cream Cheese and Pumpkin
The first step is to create a smooth, creamy base for your cheesecake balls. Here’s how to do it:
- Add the Ingredients to a Bowl: Place the softened cream cheese and pumpkin puree in a large mixing bowl.
- Mix Until Smooth: Use a spoon or spatula to stir the ingredients together until the mixture is creamy and there are no lumps.
Tip: If you have an electric hand mixer, it can make this step faster and easier, but you can also mix by hand.
Step 2: Add the Crushed Graham Crackers
Next, you’ll add the crushed graham crackers to give the mixture texture and help it hold its shape.
- Sprinkle in the Crumbs: Gradually add the crushed graham crackers to the bowl while stirring.
- Mix Until Combined: Keep stirring until the graham crackers are fully mixed into the pumpkin and cream cheese.
Why It’s Important: The graham crackers help thicken the mixture, making it easier to roll into balls later.
Step 3: Chill the Mixture
After everything is mixed, it’s time to chill the dough. This step is important because it makes the mixture firm and easy to handle.
- Cover the Bowl: Use plastic wrap or a clean kitchen towel to cover the bowl.
- Place in the Fridge: Chill the mixture in the refrigerator for at least 30 minutes.
Tip: If the mixture still feels sticky after chilling, you can stir in a little more crushed graham cracker.
Step 4: Roll the mixture into Balls
Once the mixture is firm, it’s time to shape it into bite-sized balls.
- Scoop the Mixture: Use a small spoon or cookie scoop to take a portion of the mixture.
- Roll Into Balls: Roll the mixture between your hands to form smooth, round balls.
- Place on a Baking Sheet: Arrange the balls on a baking sheet lined with parchment paper or wax paper.
Why It’s Fun: This step is great for kids to help with! They’ll love rolling the mixture into little balls.
Step 5: Chill Again to Set
To make sure your cheesecake balls hold their shape, give them one more chill.
- Refrigerate for 15–20 Minutes: Place the baking sheet in the fridge to let the balls firm up even more.
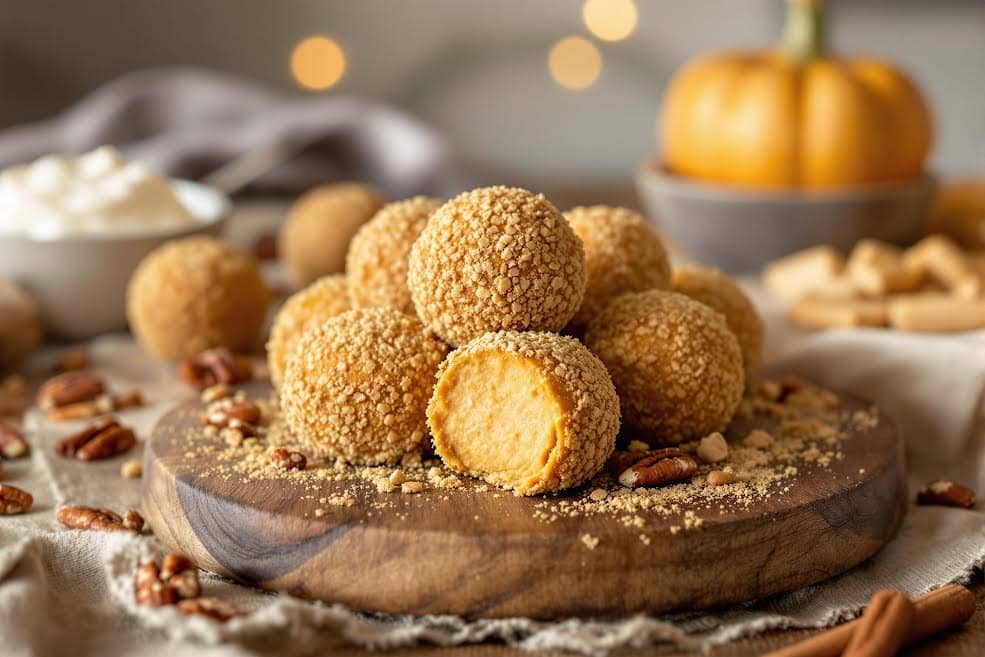
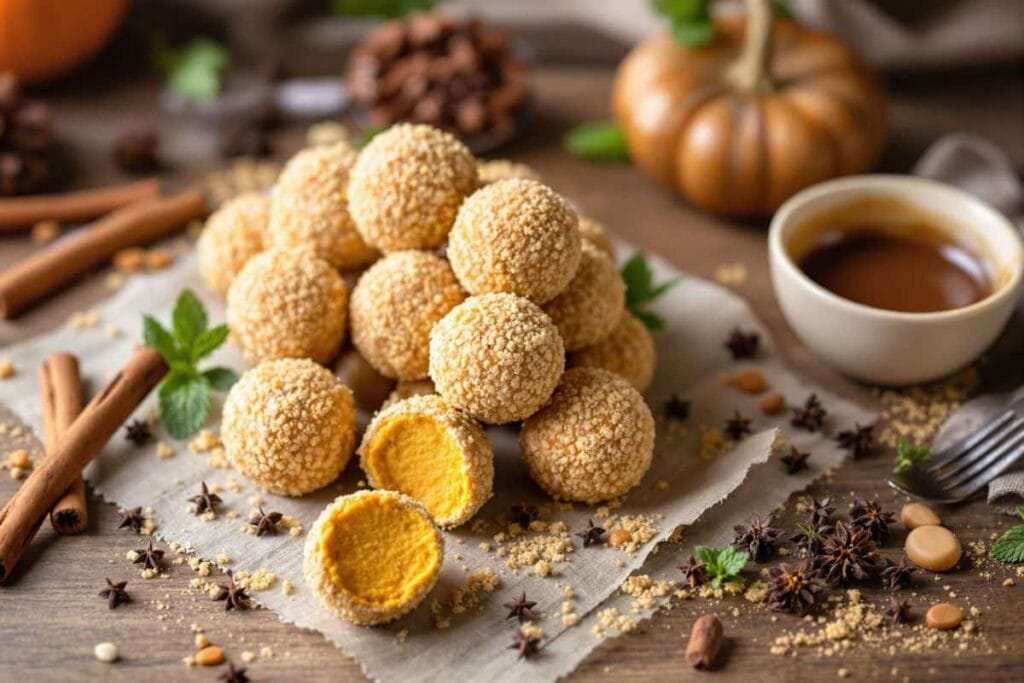
- Ready to Serve: Once chilled, the pumpkin cheesecake balls are ready to enjoy!
Creative Variations for Pumpkin Cheesecake Balls
If you want to take your cheesecake balls to the next level, try these fun variations:
1. Roll in Coatings
After rolling the balls, coat them in something extra tasty:
- Crushed Nuts: Pecans or walnuts add a crunchy texture.
- Cinnamon Sugar: A sweet and spicy coating perfect for fall.
- Shredded Coconut: Adds a light, tropical flavor.
2. Dip in Chocolate
For a decadent treat, dip the balls in melted chocolate. Use dark, milk, or white chocolate for a rich finish. Place them on parchment paper to set.
3. Add Pumpkin Spice
Mix a little pumpkin spice into the batter for an extra burst of fall flavor.
4. Make It Vegan
Swap regular cream cheese for a dairy-free version, and use vegan graham crackers. This makes the recipe completely plant-based.
5. Use Crushed Gingersnaps
Instead of graham crackers, try crushed gingersnap cookies. They add a spicy, festive twist.
Storing, Freezing, and Tips for 3-Ingredient No-Bake Pumpkin Cheesecake Balls
Now that your pumpkin cheesecake balls are ready to enjoy, let’s talk about how to store them, freeze them for later, and keep them fresh. I’ll also share some tips to ensure your dessert turns out perfect every time.
How to Store Pumpkin Cheesecake Balls
Storing your cheesecake balls properly ensures they stay fresh and tasty for days. Here’s how to do it:
Storing in the Refrigerator
- Use an Airtight Container: Place the cheesecake balls in a single layer inside an airtight container. If you need to stack them, use parchment paper between layers to prevent sticking.
- Refrigeration Time: Keep them in the refrigerator for up to 5 days.
Why It Works: The cool temperature keeps the cheesecake balls firm and fresh, making them the perfect grab-and-go snack.
Freezing for Long-Term Storage
If you’ve made a big batch, freezing is a great way to save some for later. Follow these steps:
Freezing the Cheesecake Balls
- Chill First: Before freezing, place the cheesecake balls on a baking sheet and refrigerate for about 30 minutes. This step helps them firm up.
- Freeze Individually: Once firm, transfer the balls to a freezer-safe bag or container.
- Label and Freeze: Write the date on the bag, and store the cheesecake balls in the freezer for up to 3 months.
Defrosting for Serving
- Thaw in the Fridge: Move the cheesecake balls to the refrigerator and let them thaw for a few hours.
- Ready to Eat: Once thawed, they’re just as creamy and delicious as when you first made them!
Reheating or Serving Frozen Cheesecake Balls
These cheesecake balls don’t require reheating, but if you’re serving them frozen as a cool treat, here’s a tip:
- Serve Semi-Frozen: Enjoy them slightly chilled for a firmer texture, similar to a frozen dessert.
Tips for Success
To make sure your cheesecake balls turn out perfect every time, keep these tips in mind:
1. Prevent Stickiness
If the mixture is too sticky to roll, try these tricks:
- Add More Graham Crackers: Stir in a little extra crushed graham cracker until the mixture is easier to handle.
- Chill the Dough: Let the mixture chill longer to firm up.
2. Avoid Overmixing
Mix the ingredients just enough to combine them. Overmixing can make the mixture too soft or cause it to lose its creamy texture.
3. Chill in Steps
Chill the mixture before rolling and then chill the balls again after rolling. This ensures they hold their shape and stay easy to handle.
Adjusting the Recipe for Special Diets
If you want to make this recipe healthier or suit specific dietary needs, here are some easy swaps:
1. Lower Sugar Options
- Use unsweetened graham crackers or a low-sugar alternative.
- Sweeten with a touch of honey or a natural sweetener like stevia.
2. Keto-Friendly Version
- Swap graham crackers with crushed nuts or almond flour.
- Use a sugar-free cream cheese and pumpkin puree.
3. Vegan Version
- Use dairy-free cream cheese and vegan graham crackers. This makes the recipe completely plant-based and just as delicious.
Why This Recipe Is a Perfect Make-Ahead Treat
Pumpkin cheesecake balls are ideal for meal prep or hosting because you can make them ahead of time:
- Meal Prep: Store them in the fridge for a week of ready-to-eat snacks.
- Parties: Prep the balls a day or two before your event to save time.
They’re quick, convenient, and a guaranteed crowd-pleaser.
FAQs About Pumpkin Cheesecake Balls
1. Can I enjoy these pumpkin cheesecake balls for breakfast?
Absolutely! For a fun and satisfying morning treat, check out Quick and Easy No-Bake Pumpkin Cheesecake Balls for Breakfast to learn how they can be a perfect start to your day!
2. How do I keep the balls from falling apart?
Chill the mixture long enough before rolling, and make sure you don’t skip the second chilling step.
3. What if the mixture is too soft to roll?
Add more crushed graham crackers a little at a time until the mixture firms up.
4. Can I make these gluten-free?
Yes! Just use gluten-free graham crackers instead of regular ones.
5. How do I stop the balls from sticking to my hands?
Lightly coat your hands with a bit of water or cooking spray before rolling the balls.
6. How long can I store the cheesecake balls?
They’ll stay fresh in the fridge for up to 5 days or in the freezer for 3 months.
7. Can I make them sweeter?
If you want a sweeter treat, mix a little powdered sugar or honey into the batter.
8. What are good coatings for these balls?
You can roll them in crushed nuts, shredded coconut, cinnamon sugar, or even dip them in melted chocolate.
9. Can kids help make these?
Absolutely! Kids can help crush graham crackers, mix the batter, or roll the balls—it’s a fun and easy activity.
10. What’s the best way to serve these cheesecake balls?
Serve them chilled, and pair them with coffee, hot apple cider, or tea for a cozy fall treat.
Conclusion: A Fall Treat You’ll Love
3-ingredient no-bake pumpkin cheesecake balls are the perfect combination of simple, sweet, and seasonal. With just a few ingredients and minimal effort, you can create a dessert that’s sure to impress. Whether you’re making them for a party, a snack, or just because you love pumpkin, these cheesecake balls are a delicious way to enjoy the flavors of fall.